
One of the key benefits of digital marketing is the ability to measure it’s performance to help make strategic decisions. Globally, the most used website analytics tool is Google Analytics. If you manage one of the 50 million websites that use Google Analytics, it is very possible you are not getting a true picture of how your visitors are interacting with your web site. This is not because of a flaw in Google Analytics, it is because most often the analytics includes people within your organization that either manage or look at your web site on a regular basis. Every time someone from your organization accesses the website, that session is lumped in your actual visitors. Typically, the way the people in your organization view your website is entirely different than a real visitor. This significantly skews the validity of the reporting. There is a way to eliminate sessions that originate from people within your organization, and this article is going to provide you step by step instructions to show you how.
I. You need to find the IP address(s) associated with your connection to the internet. Larger organizations typically have many IP addresses while smaller firms can just have one. If you have an IT department, they should be able to provide you with this information. If you do not have an IT department, you can call your Internet Service Provider (ISP) and ask them for this information. If you are a small company or a single person shop, you can actually Google “What is my IP address” and Google will tell you. Make sure to make a note of this IP address.
II. Log into your Google Analytic account. Click on Admin gear icon in the lower left hand corner as shown below.

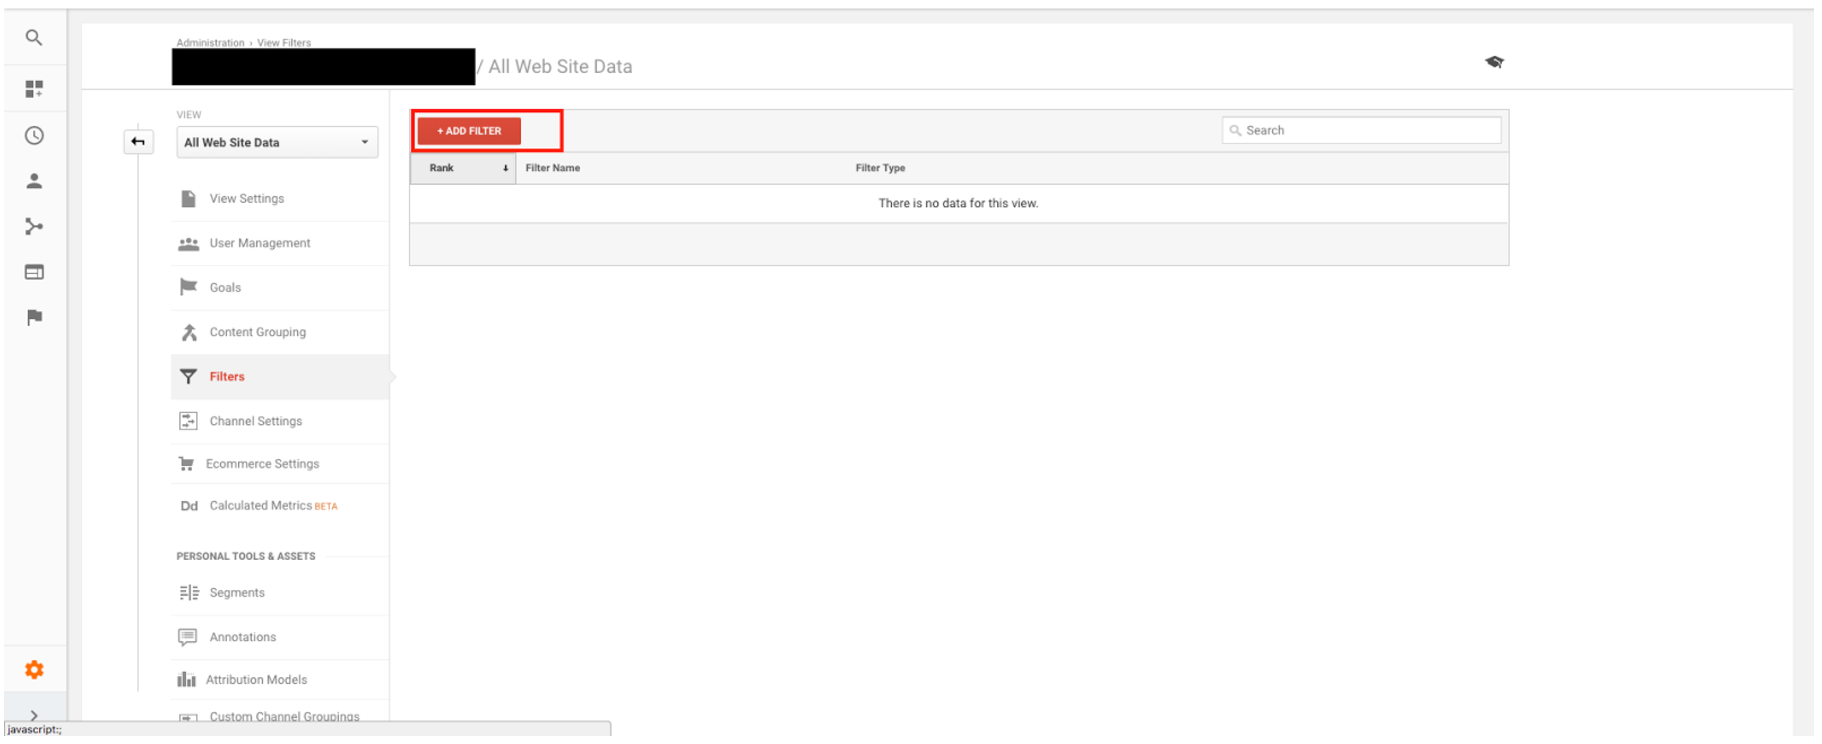
III. In the third column, click on Filters

IV. Click on the red Add Filters button.
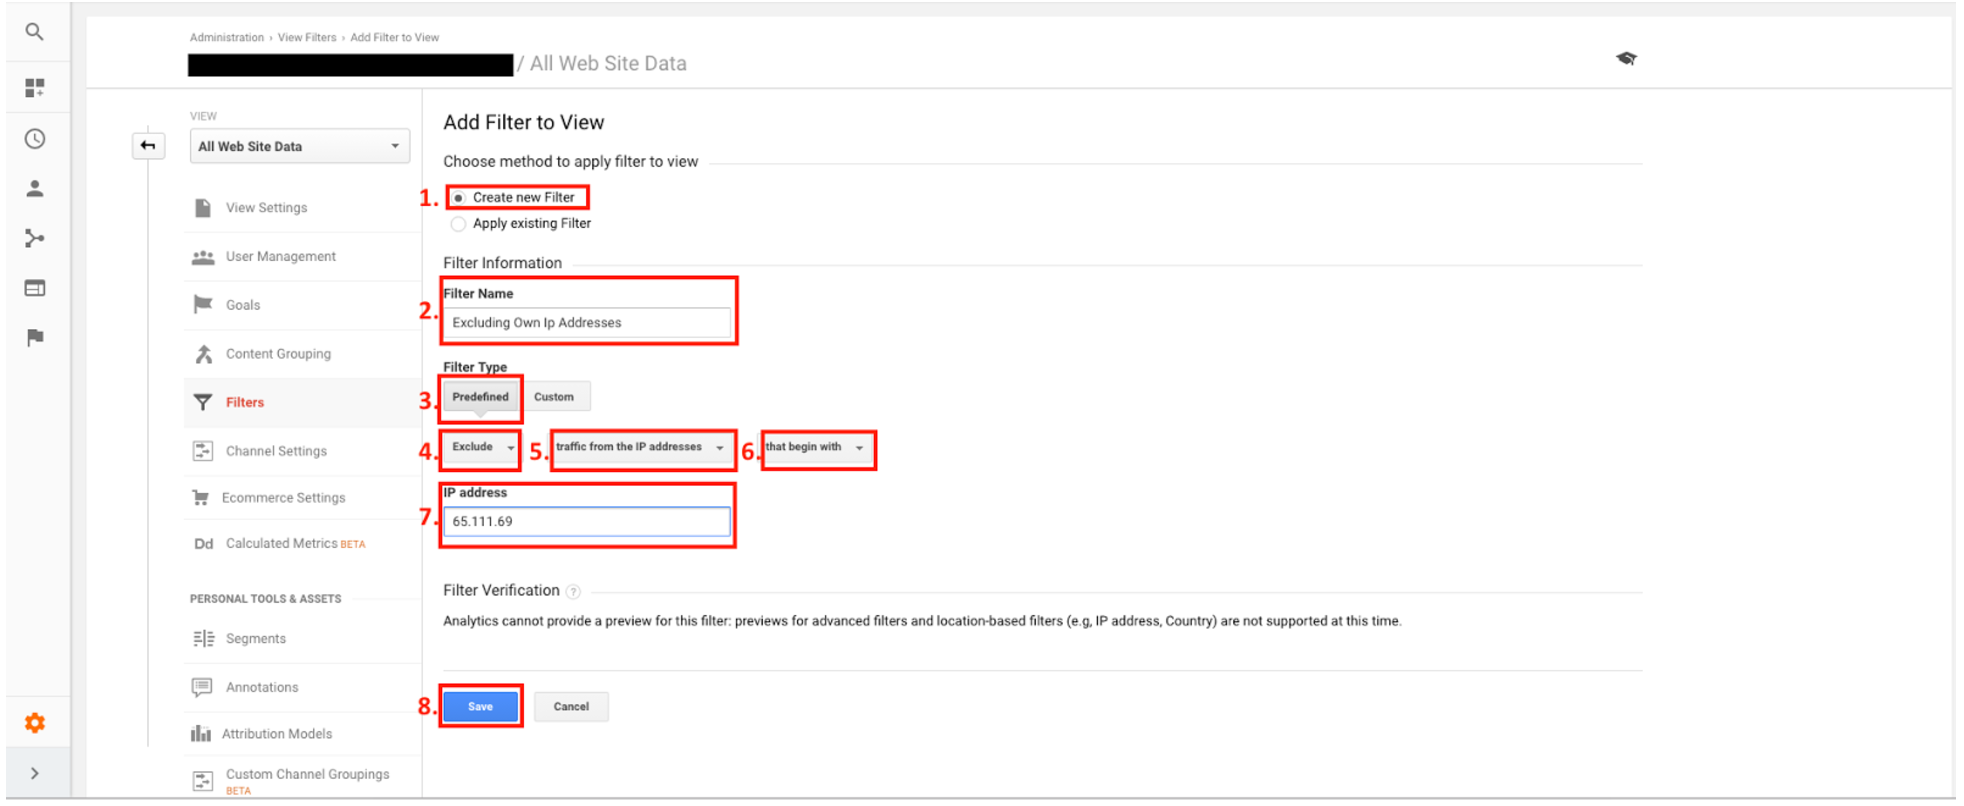
V. This screen is where you set up the filter. Please follow the instructions below:
- Make sure the Create new Filter is toggled
- Enter your own Filter Name. I recommend something like “Excluding Own IP Addresses”.
- Make sure Filter Type is Predefined.
- Select “Exclude” from the drop down box.
- Select “traffic from the IP addresses from the drop down box.
- If you have multiple IP addresses, it is likely that the first 3 numbers, if not the first 2 numbers are the same. If this is the case, select “that begin with” in the drop down box. If you only have one IP address, select “that are equal to” in the drop down box.
- If you have multiple IP addresses, and the first two or three numbers are the same, just enter the first two or three numbers here. In this example, this organization has a series of IP addresses of which the first three numbers, 65.111.69 are all the same. Enter your numbers here. If you only have one IP address, you would have selected “that are equal to” in step number 6 above, you would enter the entire IP address here.
- Click the Save button.
VI. You will not be taken to this page which confirms you have added the filter correctly. In the top of the left column, click on the left facing arrow as shown below.

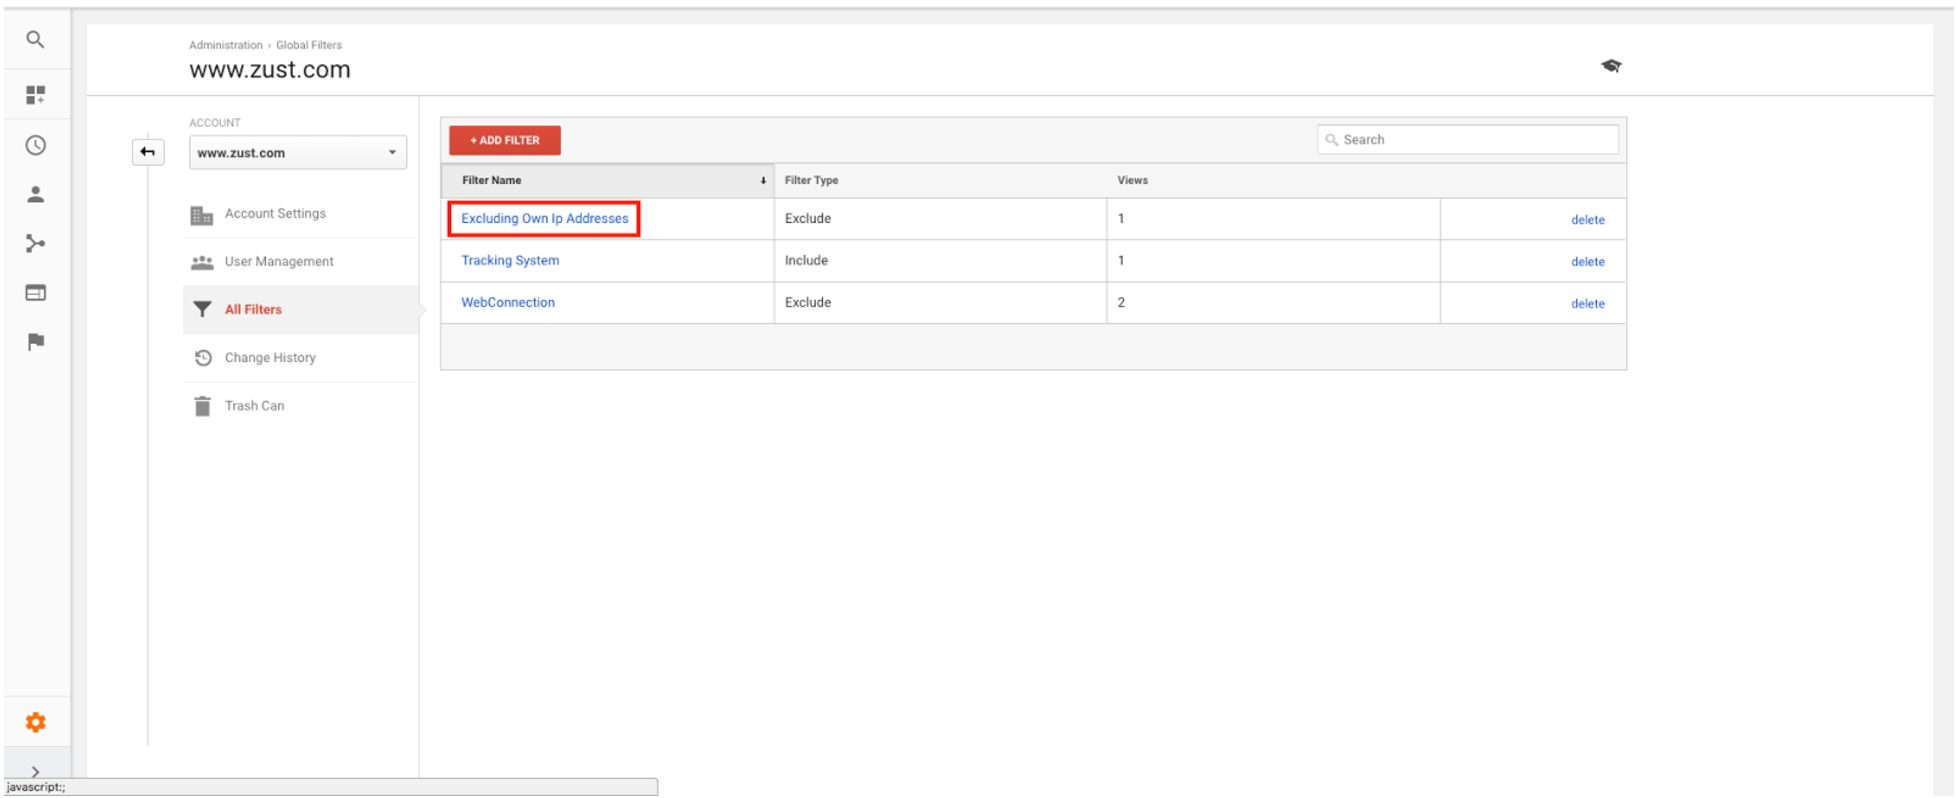
VII. In the left hand column, click on All Filters. This will show you all the filters set up. You will see the filter you just added in the list (it may be the only one). Click on the filter you just created.
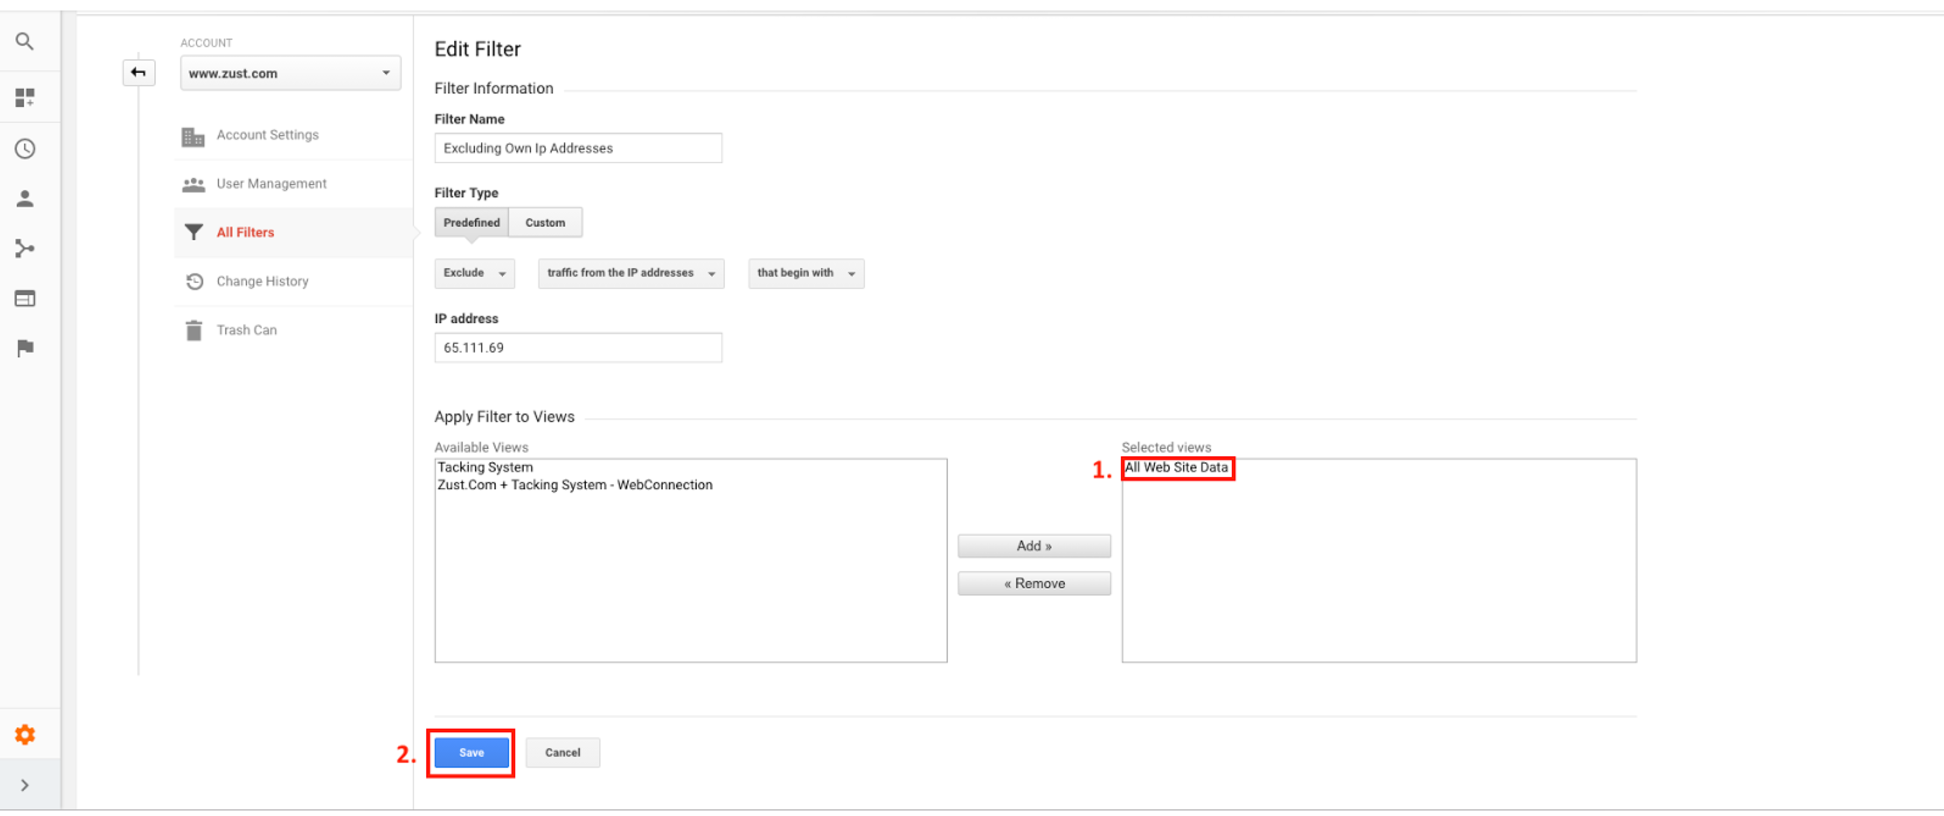
VIII. At this step, you need to apply your filter to the correct view. For most of you, the correct view is “All Website Data”. As you would expect, this view includes all of your web site traffic, which is the view you want to remove your organization’s visits from.
- By default, typically the “All Website Data” view is already on the right side under Selected views. If it is not there, simply highlight from under the Available views and click the Add button.
- Click the Save button.
Congratulations, you have successfully removed your organization’s traffic from your analytics.